

Stainless Pipe Weld Oxidation: Causes and Prevention
Stainless Pipe Weld Oxidation develops when the hot internal weld root reacts with oxygen during welding or cooling. Mild oxidation may appear as discoloration, while severe exposure can produce a dark, rough, granular surface commonly called sugaring. Preventing this condition requires effective root protection, clean surfaces, and controlled welding—not simply a higher shielding gas flow.
A bright external bead does not confirm that the inside of the pipe is acceptable. The internal root needs its own protection and inspection, particularly when it will contact a corrosive fluid or must meet hygienic requirements.
Recognizing Stainless Pipe Weld Oxidation
Blackening inside a stainless steel pipe can have several causes. Distinguish welding-related oxidation from soot, process deposits, or contamination before deciding how to correct it.
Heat tint is an oxide film formed on the hot metal surface. Its appearance can range from light discoloration to darker oxide. Severe oxidation may produce an irregular, granular root surface rather than a smooth film.
Color alone does not establish acceptance. Lighting, viewing angle, surface finish, and inspection equipment affect what an inspector sees.
Assess the root against the specified criteria for the material and service. Where visual comparison standards apply, use them under suitable viewing conditions.
Why Stainless Pipe Weld Oxidation Affects Performance
Welding-related oxide can be associated with chromium depletion immediately beneath the surface, reducing local corrosion resistance.
A severely roughened root may also be harder to clean. In hygienic or high-purity service, surface condition matters alongside weld geometry and freedom from internal defects.
However, discoloration is not a direct measurement of remaining strength. A dark root does not automatically prove cracking, and a silver root does not prove complete fusion.
Evaluate oxidation, weld profile, and structural soundness as related but separate quality requirements.
Main Causes of Stainless Pipe Weld Oxidation
The central problem is exposure of hot metal to an unsuitable atmosphere. Several setup and operating failures can create that exposure.
| Possible cause | What happens | What to check |
|---|---|---|
| Insufficient initial purging | Residual air remains near the joint | Purge volume, flow path, and oxygen reading |
| Leaking dams or connections | Air enters the protected space | Seals, hoses, fittings, and dam placement |
| Poor outlet arrangement | Air pockets remain or pressure builds | Vent location and unobstructed discharge |
| Excessive gas flow | Turbulence can disrupt the atmosphere | Validated flow setting and gas distribution |
| Early purge shutdown | The hot root reoxidizes | Required protection period |
| Moisture or contamination | Surface condition and weld quality deteriorate | Pipe cleanliness and gas system condition |
| Excessive thermal exposure | Oxidation increases if protection is inadequate | Heat input, travel speed, and pass sequence |
Changing the gas flow without identifying the cause may leave the problem unresolved. Inspect the complete purge circuit first.
Stainless Pipe Weld Oxidation Despite Good Torch Shielding
The torch protects the external weld pool. It does not automatically protect the internal root.
During a full-penetration weld, the root surface becomes hot enough to oxidize if exposed to air inside the pipe. Improving torch coverage alone cannot replace required backing protection.
Internal purging establishes a suitable atmosphere around the root. The gas and operating conditions must match the material and approved welding procedure.
Argon is commonly used, but alternative mixtures require material-specific approval. A mixture suitable for one stainless grade should not be assumed suitable for another.
Purge Setup to Prevent Stainless Pipe Weld Oxidation
Define the purge volume and arrange the system so gas displaces air through a deliberate flow path.
Localized purge dams can reduce the volume requiring protection, provided they tolerate the conditions and remain correctly positioned. Their location must allow the required heating and welding operations.
A practical setup sequence is:
- Clean and dry the internal surfaces.
- Install suitable dams, seals, and gas connections.
- Provide an unobstructed outlet.
- Check the system for leakage.
- Establish the specified purge flow.
- Measure oxygen at the required sampling location.
- Begin welding only after meeting the stated criterion.
Do not treat elapsed purge time as proof of atmosphere quality. The same waiting period can produce different results when pipe size, leakage, or internal geometry changes.
Also avoid sealing the system completely. Excessive internal pressure can disturb the molten root, particularly as the joint closes.
Oxygen Monitoring for Stainless Pipe Weld Oxidation
Use the oxygen limit specified by the project, procedure, or validated production method. There is no single universal value for every stainless alloy and application.
An oxygen monitor needs a suitable measurement range and resolution for the required limit. Check its condition, sampling arrangement, and verification or calibration status.
Sampling location matters. A low reading near the gas inlet may not represent conditions at a remote weld.
Follow the approved sampling method and allow for instrument response time. Check sample hoses and connections for leakage that could distort the reading.
During welding, maintain the atmosphere as required. Movement of dams, damaged seals, changing root openings, or interrupted gas supply can invalidate a satisfactory initial reading.
Record required measurements against the weld identifier so the final inspection can be linked to production conditions.
Heat Control Against Weld Oxidation
Effective purging and controlled heat input work together.
Excessive dwell or unnecessary weld size can prolong thermal exposure. However, reducing current indiscriminately may cause incomplete fusion. Adjust current, travel speed, and filler addition together within the WPS limits.
Later passes can reheat the root even after a satisfactory first pass. Maintain backing protection through the stages and cooling period required by the procedure.
Do not adopt a fixed shutdown time for every joint. Material, wall thickness, pass sequence, and temperature history affect how long protection is needed.
Additional preventive measures include:
- Keeping filler metal and joint surfaces clean.
- Protecting the work area from disruptive drafts.
- Maintaining suitable torch shielding.
- Following interpass temperature limits.
- Checking the root before access becomes restricted.
These controls improve repeatability without relying on appearance alone.
Assessing and Correcting Weld Oxidation
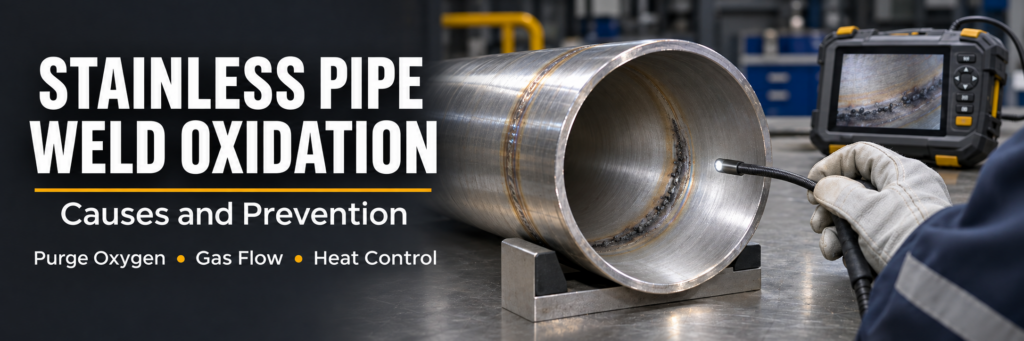
Inspect the internal root directly where possible. A suitable borescope can help document inaccessible areas, although viewing limitations should be recognized.
Determine whether the condition requires cleaning, weld repair, or replacement under the applicable acceptance requirements.
Light surface discoloration and severe sugaring should not automatically receive the same treatment. Heavy oxidation may accompany an unacceptable root profile or other defects that surface cleaning cannot resolve.
Use an approved cleaning process appropriate to the alloy and service. Mechanical cleaning must avoid introducing carbon steel contamination or removing excessive wall thickness.
Pickling, passivation, and weld repair serve different purposes. Passivation alone should not be assumed to remove heavy scale, restore damaged geometry, or correct incomplete fusion.
After corrective work, repeat the required inspection and document the final disposition.
Preventing Stainless Pipe Weld Oxidation requires a verified atmosphere at the root, suitable protection during cooling, clean materials, and stable welding conditions. Establish measurable purge requirements before production, then confirm that the finished internal surface meets the intended service requirements.